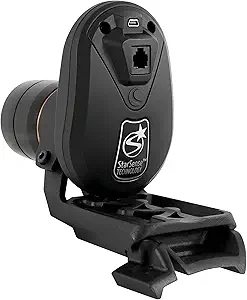
Celestron - StarSense AutoAlign Telescope Accessory - Automatically Aligns Your Celestron Computerized Telescope to the Night Sky in Less Than 3 Minutes - Advanced Mount Modeling
Electronics > Camera & Photo > Binoculars & Scopes > Telescopes > Catadioptric
About this item
- ENABLES automatic alignment of your Celestron computerized telescope
- No need to identify or locate any star in the sky
- StarSense automatically aligns your telescope, so you can begin observing in minutes
- Aligns in 3 minutes or less - Provides advanced mount modeling?
- Any mount with 5.x or greater is compatible with the software
Reviews
★★★★★
Style: Single | Verified Purchase
Amazing device!
I apologize for the length of this review, but I thought the details might be helpful for folks interested in this awesome little gadget.
My Celestron StarSense arrived last week, and I’ve had a couple of chances to try it out. I’ve used the device exactly twice, but I think my experience may provide some useful information to others who are thinking of purchasing this device.
My focus is on astrophotography and my rig is 100% portable on a tripod, so alignment is a frequent chore. I held off buying the device because I had read that it had severe issues integrating with Celestron’s native polar alignment process, ASPA (All-Star Polar Alignment). Once those issues were corrected by Celestron and I read a positive review of the device in Sky and Telescope, I went ahead and bought it. So far, I’m very glad I did.
After unboxing, I immediately updated the firmware on the StarSense camera and the included hand controller. Be sure to do this – as I mentioned, Celestron fixed some major problems with the software since the release of the device, and you’ll want to be sure to capture these. Be sure you have the appropriate cables and adapters ready for this.
Once the firmware was updated, I attached the SS camera to my scope. I have a non-Celestron OTA, but a Celestron Advanced VX mount. This was one point of annoyance with Celestron. They provide two mounting methods – a super-solid one for Celestron OTAs, and a not-so solid one for everyone else. I was mounting to a dovetail plate, and it was annoying that I couldn’t use the more solid method just because Celestron had made the mounting holes too narrow. If they had just provided a couple of holes at the standard mounting sizes they could have given folks a lot more options. Left with the secondary mounting method, I was glad I had an extra mounting base available, because Celestron doesn’t provide one with the unit (they assume you’re replacing your finderscope with the SS camera). I sacrificed my mounted laser pointer in favor of the SS camera and continued. If you have a single finder\guider and no other mounting base available when the unit arrives, you’ll be waiting for Amazon to deliver before you can use the unit.
After setting up outside and doing a rough polar alignment with a polar scope, I turned on the mount with the new HC and SS camera attached. The first thing the HC does is search for the SS camera, which it found with no problem.
At startup, the HC gets a little “bossy” – there doesn’t seem to be a way to start up without going through the SSA (StarSense AutoAlign) process before doing anything else. I’m used to entering the Date\Time and location, but that didn’t seem to be an option at startup. You can press the Menu button to add those details, but I didn't know that at the time.
I let the SSA do its thing, and it slewed to four different sections of the sky. I was in my side yard, where the house and trees block much of the horizon, and light pollution is fairly severe. I had also neglected to turn a bright flood light attached to my roof off, just to keep things interesting. I started quite early, and I could only see 5-10 stars visually. I noticed that the HC was reporting that it was finding dozens of stars in areas of the sky where I still couldn’t see any.
After a couple of minutes, the SSA wrapped up and reported success. At this point, I was 90% certain that the device hadn’t actually done anything – it was just a little too quick and easy. I told the HC to find Albireo. There it was – off center, but within the FOV of my 20mm eyepiece. Not bad. I told it to find Antares in the south. There it was. Whoa.
At this point, Celestron has you resolve the error between the SS camera and your telescope by performing a centering procedure. This is done in the HC’s software and doesn’t involve adjusting the camera physically, which was a relief – I think I’ve had enough “dance of the thumbscrews” for one lifetime. The HC has a process for this that involves centering the star in your eyepiece and then confirming that it is centered with the HC. This was simple enough, but the (printed) instruction manual actually has a mistake in it about the steps in the process. It's a good idea to just download the (corrected) online manual if you buy this device.
After the centering procedure, the HC tells you that you will need to repeat the SSA process. At this point it was a little unclear whether it expected me to simply run the process again or actually reset my mount to the alignment marks and start over. Thankfully, the former seemed to work just fine.
Now, I had done all of this before entering the date, time or my current location. It seemed wrong to move on to polar alignment without entering that data, but then again – does the HC need to know the time or location if it knows the positions of all of the stars, especially if you’re not targeting solar system objects? The HC certainly didn’t seem concerned about it – I had to go menu surfing to even find where to enter the date\time\location – I was never prompted for the information. I went ahead and entered the info and the HC told me to perform SSA again, which I did.
The polar alignment process was simple. ASPA normally has two steps – the first where you center a star using the direction buttons on the HC, then the second when you’re asked to center the same star using the mount’s ALT and AZ alignment knobs. With SSA, the first step is done automatically and the user is left with the ALT and AZ adjustments.
After the centering\calibration process and ASPA, any stars or objects I selected were perfectly centered in the reticle eyepiece. I spent some time selecting objects near the four points of the compass and just being amazed when they all came up dead center. I started guiding and did some test shots using the CCD – I had perfect pinpoint stars for 12 minute exposures. That night I took 14 12-minute exposures of the Pelican Nebula and had some of the sharpest, roundest stars I’ve ever imaged. Long story short - ASPA was very easy and very accurate.
On the second night out, I was just doing a rough alignment so I could take pictures of the moon with my bigger scope. I simply took the device off my refractor and put it onto my SCT, put the OTA on the mount, hooked it up, turned it on and let it align. I started even earlier that night, with only a few stars visible to these middle-aged eyes. No re-centering or fine-tuning, no entry of date or location, no polar alignment. A couple of minutes later, the SSA was done and the GOTO put the moon in the FOV of my 20mm eyepiece on the first try – this is with a 10” SCT – the FOV was less than a moon-width. I also tried several stars and they were all close to center, despite a different OTA and not performing a new centering\calibration procedure.
The bottom line: this device exceeded expectations on its first two nights out. I’d say if you have a portable setup this is a no-brainer purchase.
Pros: Easy setup (other than the firmware update); easier telescope alignment; simplified ASPA; more accurate polar alignment (at least in my experience). Works in twilight, so you can start your alignment earlier. Works despite trees and\or buildings obstructing large parts of the sky. Fast.
Cons: Mounting brackets aren’t all that they could be (see above). Finder mount base not included. New HC has small-print display by default – can be hard to read especially from a distance.
★★★★★
Style: Single | Verified Purchase
BUY THE DAMN THING NOW
BOTTOME LINE: buy this thing now!
Full Review:
My first attempt using this was a disaster. was ready to return the product. The manual is well out of date (lists the Hand controller with a phone jack port, its actually a usb mini which is awesome, and many other examples). I bout this for astrophotography for my celestron AVX and CGEM mounts. I have an edgeHD 8 OTA, and a 4.25in stellavue triplet apo. I followed hte instructions as best I could accounting for it being well out of date, as there have been many firm ware upgrades since the instructions were writing, and it needs a massive update. The most critical error is the first few lints of the instructions says to not bother leveling the mount. This will be prove to be my undoing.
First night I went exactly by the directions in the book, and this thing was so inaccurate I was enraged. Stayed up to 3am on a work night as I couldn't let it go, power cycling and re aligning, adding 10 ref points to the 4 points it takes automatically, and this thing was 100s of arc minutes off. It was bad. My first concern was the steps listed in the manual did not automatically occur as it was listed. For instance there option to set the date and time, location, etc did not pop up, luckily I have experience with the mounts already and knew how to jump through menus and make these adjustments, but Im on the east coast and it defaults to California. But its worth the trouble to have the usb interface on the HC.
The most egregious error was the instructions state you do not have to level the scope. You dont have to polar align the scope (this is true). Night # 2 I decide to give it one more go before sending this thing back, and OHHH am I glad I did. I decided to use my normal setup routine for when I use the 2+4 manual alignment procedure, so I levels the scope ( use use a 10" 3$ level from harbor freight) which only takes like 2 minutes of extra time adusting the tripod leg lengths, I did a cursory polar alignment with my polar alignment scope, wasnt dark so this was not very accurate, I made sure date and time were correct and they were, turn on the mount, it takes about 20 secs for it to give me the message that the mount has synced with the camera, it says press align to start the alignment, so I do. I sit back and it about 90-120 secs, it slews on its on to 4 areas of they sky, stopping for 15-30 secs on each to take a pic, of course you dont see this pic, but the HC LED display keeps you constantly updated on what its doing, including the % complete while its calculating the stars it discovered to its database, and how many stars it sees in each frame. If the scope points towards something blocking the sky, such as my house, it quickly identifies this and moves to a new area. After the initial automated process, it suggests for astrophotography purposes, but I decided to slew to Virgo just to see how accurate this was, and BAM, damn near top dead center.
U use backyard EOS and a canon T5i, and in the frame and focus panel of BYEOS, this thing was just at tiny bit off center, I dont know the arc secs or arc minutes, but it was about 4 widths of the star virgo on the screen. THis was darn near as accurate as my manual aligment process. Slew to orion nebula. WIth my scope and the focal reducer, with teh T5i, orion takes up 1/2 the field of view on the photo, its a little off center, i set the motor to speed of 3, move a bit, snap a pic, now I know what directions to go, move the other way a few times while snapping pics, and boom its now dead center. I took 60 second exposures, oh head theres drift, so I polar align, then let it manually re-align, I slew to orion, was a litte off, move away from orion and added a ref point, moved to the other side of orion, new ref pt, did this 4 total times (took like 2 mins), and autoslew back to Orion and BAM, it was perfect. I actually moved the scope just to take it off center for visual asthetics. 60 sec exposures, no problem with the alignment, but i live in Athens GA, and the light pollution is so bad I had to cut back to 45 sec exposures.
To review: Once the scope is leveled and balanced, i fire this thing up, 20 sec wait for software to load, I click one button, sit back and drink a beer until the scope stops moving (~ 2 mins), I move to the object I want to photograph, I then add 3-4 extra ref points, slew back to that object and then use the star to polar align. The polar alignment takes just about 2 mins for me to adjust the scope with manual knobs to get the star in the cross hairs. Now I auto align again (2 mins), move to a target, add 4 ref pts (2 mins), and off I freakin go. What just a few nights ago took me literally 1 hour, and this hour mind you was spent laying ont eh cold ground on my back siting starts, torquing my neck, crawling on my hands and knees to visually get these starts in my view finder to to the alignment manually... now the whole damn shabang takes 15 mins, and I do it from the comfort of a chair w/o having to put down my beer. I have used the scope every night, as I dont have to worry about the 30 min scope setup time and the 1 hour alignment, polar alignment, and realignment jsut to be killed by clouds taking out the sky and negating my efforts. The times this saves me allows me to photograph on work nights and be in bed by 11pm, to get up before work and get a few shots of an item in the wrong season, I could not be more thrilled. If this is compatible with your mount BUY IT NOW.
Heres the pic:
★★★★★
Style: Single | Verified Purchase
You NEED this!
I was very frustrated trying to correctly align my AVX mount and 8" Newtonian ('Celestron Advanced VX 8" Newtonian' package). I eventually learned what Polaris looks like up-close but never could be sure I was correctly aligned with the other alignment stars because a zoomed in view looks pretty much the same as a zoomed out view: many, many stars, some bright and some dim. I spent hours going back and forth between the eyepiece and a star atlas, attempting to verify I had the correct alignment stars but I only got a decent and correct alignment ONCE in six months.
Enter the StarSense. This thing is magic. You replace your hand controller with the new one that comes with the StarSense and replace your finder scope with the StarSense camera. To align, you just have to point your scope roughly at Polaris then start the alignment. It takes a minute or two, slewing the telescope to different areas of the sky in order to find its position and then it's done! My location is very dark but also heavily obstructed by trees and the alignment has never failed to find enough stars to align. Magic. The only times it doesn't work is if the mount is set up wrong (loose clutches or not balanced) or the several times I left the StarSense lens cap on...
When you run it the very first time, you should perform the one-time calibration; the un-calibrated alignment should be good enough that the target object should be somewhere in the eyepiece at 50x mag (e.g., 20mm eyepiece in a 1000mm scope). For the one-time cal., you center the object and hit calibrate and it improves the accuracy even more. I should note that even the calibrated alignment isn't perfect - it does not usually put the target object dead center in the eyepiece. But it is close, much closer than I ever got with a eyeball alignment.
Without this gadget, I think I would have given up on stargazing and sold my scope. A manual alignment is just too difficult for a solo beginner, especially with a Newtonian where you often must contort yourself just to see into the eyepiece, never mind then trying to correlate the view with a star chart to see if you are in the right place.
I didn't buy a telescope to learn the patterns of the stars around Polaris, Mizar, or Betelgeuse, all while assuming some cramped position and either freezing or being eaten by bugs. I wanted to see the good stuff, and with the StarSense you can skip all that and go straight to the good stuff!
The planets are easy enough to find once you become a bit acquainted with the sky because they are so hella bright, but with a good alignment for your EQ mount, you can keep them centered long enough to swap for a high-power eyepiece and have a really good look. Or you can connect your camera and snap a picture. But for me, where the StarSense really shines, and justifies it's rather high price tag, is that it enables the full potential of the go-to EQ mount system for finding deep sky objects (DSO). Like I said, the planets are so bright that you can tell if they aren't in the view, but with DSOs like nebula and galaxies, you can barely see anything, often nothing, in the eyepiece with your eyes. It's only when you connect your camera and take a 30-60s long photo that they become visible because they are so faint. Without the automatic alignment of the StarSense, I NEVER would have found anything except maybe the Orion Nebula.
The StarSense is a must have for a beginner like me. Since I got it, I know MUCH more about the night sky now and, ironically, could probably do a manual alignment without it. But I never would have got there without it; it got me over the hump.
I did have to switch to the smaller bracket that comes with the StarSense to match the finder bracket on my C8-N. You can also add a second mount to your scope (may involve drilling) to keep your finder. You should also make sure, before you start, that you latitude is set correctly on the mount. This is a one-time mechanical adjustment for your location that you should only have to change if you move your scope more than 50 miles or so north or south. The mount should also be on level ground, unless you can come up with a way to level it yourself.
The Wi-Fi dongle is a must-have accessory, by the way, and is perfectly integrated with the StarSense. You can do everything from your phone, initiate alignment, calibrate, etc. I hate the hand controllers, but that's for a different review.
★★★★★
Style: Single | Verified Purchase
Don't give up, Update the Firmware.
What a wonderfull device for amateur astronomers. After many failed alignments because there were so many stars in the eyepiece and not being able to identify which was which, the StarSense was eagerly awaited.
At first I would have given this device a very low rating because it failed to do its base function, it would not align the telescope. (Celestron 9.25 SCT AVX) It was very frustrating because the "Auto - Align" function would just lock up. I have an obstructed view, many trees, and the scope would just point at the willow in the west and be confounded in what to do. Even when trying to do a "Manual - Align" I would get stuck in an endless loop. I was sadly disappointed and was ready to return it.
The included instruction manual is not current or correct, that's a sad statement for Celestron, even the online manual is not correct. The Menu function button on the hand controller should be explored.
So now I had a new computerized scope, the Sky Portal Wi-Fi device and app and StarSense and I still couldn't "Go-To" anything because I couldn't get an accurate alignment. Being one not easily defeated I ventured into the Web and found many others who were disappointed, but no one had all the answers, bits and pieces came together and I finally came up with "It needs a Firmware Update" (Check your cable needs) so off I went to Celestrons website and after searching around I found the updates. No YouTube videos, none of the Astronomy Forums or instructions from Celestron are correct on how to do the updates, but they are easy to do, just make sure to update Java on your computer to the newest update first. The update files come with a photo of how to cable the devices before starting the update. It is correct. Once you have JAVA updated and unzip the files everything is pretty straight forward. After three failures to update (My fault, I missed a cable) I had success.
A week later I was able to try out the updates. I had purchased a 10" tablet to run the Sky Portal app on as my eyes aren't as young as they used to be and the smartphone was just to small to see in the dark. I assembled the scope and let it acclimate, I powered up the scope before dark to update the time and location, remember the "Menu" function key on the StarSense Hand Controller. Then I powered down the scope and waited until the skies were dark enough to begin calibration.
I powered up the scope with all devices (StarSense Camera, Hand Controller and Sky Portal Wi-Fi Module) securely attached to the mount. (Remember at this point to remove the lens cap on the StarSense Camera) I then started the Tablet and in "Settings" connected to the Scope via Wi-Fi. All of the Sky Portal documentation said that everything would recognize each other, I was skepitcal. I then chose "Connect and Align" from the app on the tablet. Sure enough the scope swung to the west and the willow. The app said it was taking a picture but couldn't resolve the plate, imagine to my surprise that the scope just swung to a different point in the sky and continued the alignment. After a few minutes and 4 "Solved Plates" I was asked to choose a calibration star to align the Starsense Camera with the OTA. I chose Vega as it is the brightest star from my location and there is no mistaking it for another in the eyepiece, it just lights up the eyepiece. I was then instructed to do another Auto alignment and Bingo, it was Magic. Finally a computerized Go To scope that does just that. It goes to everthing I ask of it, Objects pretty much centered in a 12 MM eyepiece. (195X on my scope.)
I am very satisfied with how everything is finally functioning and is fully integrated. The only additional expense I incurred was the need to communicate via Serial device to the scope, I purchased a "TRENDnet TU-S9 USB to Serial Converter" cable from Amazon that facilitated that.
★★★★★
Style: Single | Verified Purchase
This thing is amazing!
I was kind of uneasy spending so much on this, I bought it thinking I would just return it after it not working. Boy oh boy am I glad it works, amazingly, in fact! While waiting for it to arrive I did a bunch of research, read reviews, etc. To be honest it goes one way or the other. One thing I read was NOT to upgrade the firmware, and I COMPLETELY DISAGREE!! The manual was convoluted and not well written in the software area. I am glad I upgraded the firmware, because the aiming process now is WAY easier and the screen tells you <almost> everything you need to do. Updating it is simple enough.. Get an older USB cable, and download the program CFM from Celestron, and make sure you have java installed. Hook up the unit as prescribed, plug the USB cable in to the handset then to computer, then power up telescope, run CFM. It automatically detects your telescope and all connected equipment and downloads updates. Push upgrade and voila. The manual is correct when it says to do an alignment immediately after the initial StarSense align. All I had to do was turn it on, slew to home marks, enter time, date, time zone and DST, then push enter. It did exactly as advertised and scanned the sky and said it was ready. I DID NOT HAVE TO ENTER A LOCATION!! So I looked in the eyepiece, and nothing, I expected nothing just yet, but boy was it close. I selected a visible star from the stars menu for it to slew to, and it moved to the general area. Then I backed out to the Calibrate StarSense module and ran it. It knew what I was trying to point to! First coarse centering then fine in the eyepiece. Definitely use low magnification for coarse, then bump up to high mag for fine centering. Bam. For the rest of the night whatever I punched in to go to, it was centered every time. This was my first night out using the unit, and I DID upgrade the firmware out of the box. I would really like to say it is necessary. This thing is amazing. If you want a truly go to experience, this is the way to go. A must get.
Oh...
Celestron NexStar 6SE
My only mod is the StarSense, and a bunch of lenses and filters.
★★★★★
Style: Single | Verified Purchase
Absolutely love it!
We own a Celestron Nexstar 8 SE and found the 3-star alignment difficult and it cut into our sky viewing time so decided to try this out even though reviews were pretty mixed and after spending 1200 on a telescope plus several hundred dollars in filters and eyepieces....well we were pretty hesitant to purchase this item. So first things first! First use the manual to mount the camera on your telescope. Second, make sure to update the firmware as soon as you get it mounted. You can go to the Celestron website to do this...there is a great tutorial on You tube for this, where to find the file and how to download it, etc. I am not an expert with computers but the video was great. Third, Do not use the manual for set up! There is a 5 minute tutorial on YouTube from Celestron that was perfect! First attempt was a success. So make sure you use You tube for the firmware update and the first time you have to align it. The manual was confusing but the video is 4 steps for alignment. I can say we are new to astronomy and set up was a lot easier than we expected. We took the telescope out the following night and after entering time and date (yes you still have to do this part), we selected align and within about 2 minutes we were ready to go. I am really glad we decided to purchase this item, it has saved us so much time and we have enjoyed doing the different tours available. We live in a highly light polluted area (just right outside Nashville) and this still worked great! No more fighting with my husband on why he can't find 3 stars to align the scope, now we just argue over who left the camera lens cap on and whose responsibility is was to remove it :-). Wishing clear skies for all!
★★★★★
Style: Single | Verified Purchase
Accurate Auto-alignment Releases the Power of a GOTO telescope
Aligning a Celestron GOTO telescope "by hand" is a time-consuming drag, and difficult to do in light-polluted environments like the one I live in. The StarSense auto-aligner turns that task into a 2-3 minute hands-off experience that requires minimal set-up by the user.
I do have one big caveat. When I attempted my first alignment, it failed miserably, and the software in StarSense had altered the latitude of my location (which I had previously typed in as part of the set-up). Upon going to Celestron Support, I found out that I needed to upgrade the firmware for the StarSense. It turned out that the firmware in the one I bought from Amazon was dated 2014, and there had been six subsequent upgrades published by Celestron. Fortunately, I know enough about computers so that the task of upgrading the firmware was not too difficult. After that the auto-alignment performed very well. That Celestron took the trouble to do six upgrades in four years is a tribute to their support team, but that does seem like a lot of upgrades.
Now that the power of the GOTO feature of my telescope has been enhanced by fast and accurate auto-alignment, I expect I will be using my telescope a lot more than I have been.
★★★★★
Style: Single | Verified Purchase
Exceptional Product - A must for Celestron Mounts
I have been a Celestronomer for almost two decades, using a variety of their Alt/Az mounts and SCT telescopes. Up until now I've wrestled with and relied purely on manual alignment, and have become quite proficient/efficient at the process over the years. With that said, even on my best night, the manual alignment process yielded only "fair" results - with "Go To" being relative, normally getting my target in a very low power eyepiece FOV, but not always, even with the addition of 5 additional alignment stars. And, on my best night, it was a 15-20 minute proposition.
Sky time is precious. Observation time is precious. This year I made the move and upgraded to a combination of the Celestron Advanced VX 6" Refractor scope and Celestron CGX GEM mount. A big scope, a big mount, a bigger PITA to align. I stumbled upon the Celestron StarSense Autoalign accessory while researching the scope itself. The reviews I read were mostly positive, but many opinions seemed to say "usually works, but why waste the money, manual alignment works just as well, just takes a little longer". Because Sky Time is precious I decided to take the plunge - I've had great luck with Celestron gear and since this is part of the Celestron ecosystem I figured what they heck. FYSA, I also use the SkyPortal Wifi module and iPhone App. This is important. I think my experience might be much different, but all of this comes together in one easy to use interface on Sky Portal.
So, all of that is preamble. I've been using the StarSense for just over a month now and have 4 sessions under my belt. Important note, as soon as I got the StarSense I connected all components of my system (StarSense, StarSense hand controller, CGX mount, SkyPortal Wifi module) together and updated all the firmware using CFM. All Components needed firmware updates. I suspect that many of the frustrations described in reviews are because of incompatible or out of date firmware. Firmware update was easy (I couldn't use a hard connection, had to update over WiFi, good thing I had that, Celestron needs to figure that one out and update their manuals - quite frankly WiFi should be built in as a standard feature). After firmware update I took everything out and set it up during twilight. As darkness settled I powered up the system and opened the SkyPortal App, hit "Connect and Align". The app detected the StarSense just like it's supposed to, and immediately went to work. 3 minutes - 4 star alignment complete. I was flabberghasted - it all worked, and it was easy! I took the next step and calibrated to my scope (you only need to do this once), then re-aligned. The entire process from start to finish took me 10 minutes, maybe. And the alignment - amazing. I moved around the sky using the Sky Portal App (which is so easy, just touch the target to select, and hit "Go To". Pointing accuracy with Star Sense is orders of magnitude better than a manual align - will put your scope on target using short focal length eyepieces. I added alignment stars as I hopped around to sweeten an already superior solution - Star Sense was dead on.
Since that first night I've enjoyed 3 more sessions, using StarSense every time to align. It has worked flawlessly - every time. I have found it will find stars not visible to the naked eye, so you can align during late pinkie time and be ready when true darkness arrives after CNT, again, maximizing Sky Time. It just works. It is completely automatic, fast, and easy. Alignment is now just a brief interlude, not a major chore, and the quality of the alignment is incredible. The accuracy of the alignment saves more time - puts me right on target so I can spend more time looking and less time adjusting. Where it's really made a difference is with faint DSOs. With StarSense, when I GoTo a DSO, I KNOW it's in the FOV, even if I can't see it. If I can't see it I can work on the eyepiece/focus solution and either bring it out, or not, but I don't have to spend time wondering if I'm even looking in the right piece of sky.
So, if this seems like a glowing review, it's intended to. It's so refreshing to buy a piece of technology and have it completely exceed expectations. If you are on the fence, don't be, the StarSense is worth every penny and more - pure magic!
★★★★★
Style: Single | Verified Purchase
Works perfectly
Like another reviewer asked, "what's the problem, people?" I had absolutely no problem getting the StarSense to align my Celestron 6SE perfectly and quickly. That's not 100% true, my first attempt at aligning returned a "failure" error. That's when I noticed I was way too close to my house (which was basically blocking the entire western horizon) and it was also still pretty bright out so there were few stars visible. I waited about 30 minutes and also moved my telescope about 20 feet away from the house. The second attempt at aligning worked perfectly. Not sure how some others are having so many problems, but I'm not one of them.
One especially important tip I'll offer is to be careful during the initial setup. You only get *one* opportunity to set up the correct city/state location. If you mess that up, your unit will be set to the default location of Torrance, California, and the unit won't ask you again. You can change that in the (Menu) manually, but I think that's the cause of a significant amount of problems people have with this unit. If your SS thinks you're in California, but you're actually in Maine (or even Idaho, it doesn't take much geographic change), you're going to get all sorts of wonky behavior.
★★★★★
Style: Single | Verified Purchase
5 stars although not perfect
I'm giving 5 stars because I think this products benefits outweigh it's faults.
My impressions will be ongoing as it arrived in the mail yesterday, and I used it last night. So my perpective is from that of a newb. I ordered it from Amazon together with the Celestron Wifi adapter for my Celestron CPC 1100 scope (also from Amazon).
My biggest worries was that it would need a firmware upgrade and that it wouldn't talk well with the scope or the Wifi adapter or phone planetarium software. All those worries were unfounded, as it worked very well without any firmware upgrades.
It was very easy to set up if you follow the controller prompts which also matched the how-to video that Celestron put out. At first it slewed for about 5 minutes without locking on anything before I realized that the cap was still on the lens (duh!) so don't forget to take the cap off.
Once the cap was off, it found about 100 stars in every calibration in my moderately light polluted skies and minimal view of the sky (maybe could see about 50% of the sky because of houses and trees). But it handled it cleanly. Would the alignment have been better if I had better views? Possibly, as the final alignment was not dead accurate, with the targets being slightly off center. The images were still present in my 13 degree eyepiece though, and a tap of the directional button put it in the center.
Combined with the Wifi Adapter, this felt like next-level astronomy in the 21st century. Very cool! In about an hour, I was able to observe about 25 deep sky objects, and it was a blast. No regrets, and i think this will help me use my scope more, which is a good thing.
I appreciate this too, because I don't have the best back, and this device saves me from the awkward contortions of looking through a straight finder scope that came with the CPC 1100. That alone makes this worth it.
The bad? I had to calibrate it to a star three times, which felt like it wasted a lot of time. This was because I did it first with the hand controller, then with the Celestron SkyPortal app, then with Sky Safari 6 Pro. It would have been nice if it just remembered the settings, but hey, maybe I won't have to do it ever again. And since it wasn't perfectly aligned, I have to wonder if I did something wrong or if it just isn't 100% accurate.
Recommended.
Question & Answer
Question :
Will the Star Sense Auto Align work with the Nexstar 5SE telescope? And can I still use my GPS add-on accessory
Answer :
The StarSense should work with the 5SE. I have a friend with a 6SE and it works fine. As for the GPS, there is no need for one with the StarSense. The manual has not been updated to meet the firmware that comes with the device. You no longer have to enter your location. As long as the mount is level, you enter the correct date and time, and you start in the "Home" position, StarSense is able to determine your location automatically from what it sees. As for your question regarding the GPS, StarSense is not compatible with any GPS system. It has no need for one as I mentioned. I hope that helps.
Question :
I'm abit confused with this device. Does it take the place of the finder scope or attach to it? Can this be used with autoguiders?
Answer :
Takes the place of the finder. You can mount it in addition to the finder but the finder is no longer used in the alignment process.
Question :
Sooooo, this is not an auto alignment device if you have to manually align it, then hope it maintains what star you picked to go back to “realignment?
Answer :
The StarSense accessory is indeed an auto-alignment tool. However, as the camera and firmware cannot assume the the center of the StarSense camera is perfectly aligned with the center of your eyepiece, a calibration routine needs to be done when first installing to tell the StarSense precisely which pixel on the camera lines up with the center of your eyepiece. This calibration is saved in the camera and only needs to be re-done if the StarSense bracket is adjusted or the camera is moved onto another telescope. The StarSense looks at fields of stars, not individual stars, and it uses those fields to determine the exact center of the FOV for each alignment "point."
Question :
Does this work with the Celestron CPC 925 Schmidt-Cassegrain?
Answer :
According to the compatibility chart in the instructions it is compatible with the CPC models. I have a CPC925 also, but have it attached to a Nextstar6 evolution. I think because the evolution is a newer model I had to upgrade the firmware. Probably might have to upgrade it for the CPC. All the Celestron Schmidt-Cassegrains use the large bracket that attaches the camera to the scope. The camera slides off the bracket making it easier to attach bracket to scope. Once attached slide camera back on bracket and use the special long screw (bolt) that keeps camera on the bracket. Celestron website has firmware update with instructions on how to use. Celestron tech support was also helpful with email on how to upgrade. The picture attached to my original post shows the cables needed to upgrade the firmware and how to set up. Good luck, I hope my cpc works after a year in storage, terrible clouds and fog in this area.
Question :
Does this align accurately enough on a CGEM or an AVX for astrophotography with C9.5. I need prescise and accurate goto, at times @ focal length 11
Answer :
If you take your time and follow the instructions it should be perfect.
Question :
Can Star Sense align with the sun?
Answer :
No, not automatically, but you could perform a solar system alignment using the sun.
Question :
I only have a view of the southern sky, will this make it easier to align my scope? Does it require that i see polaris? I have a Evolution 8.
Answer :
You can align a number of different ways,I can not see Polaris from my driveway and have no problems aligning my 6 se. It is worth the money to me. I say get it and don't look back.
Question :
Is accuracy - good enough to use for polar alignment for astro imaging!? or just helps with "goto's" ?
Answer :
The starsense auto aligns your telescope mount so you don't have to do it manually. It has nothing to do with polar alignment. To Astro image you need something like sharpcap or PhD drift align. Celestron also has a built in polar alignment feature that will get you close enough, some people only use that.
Question :
will it work with a meade lx200 with autostar
Answer :
No. It is strictly for Celestron mounts. If you were to mount a non-Celestron OTA on compatible Celestron mount, then it should work. The electronics in the mount are the determining factor.
Question :
I have a se8 with a wegd will this worh. Also do you have to realine if move to different location .thank you
Answer :
Yes this will work. You will have to tell the star sense hand controller that there is a wedge in your setup. You will always have to realign whenever you move the scope mount to a different position, even just bumping it can throw out the alignment. best to join a forum like cloudynights - lots of helpful people on there.

Comments
Post a Comment